Deploying a PlanetScale, Prisma & Next App to Vercel
Dhruv Gursahani / Nov 5, 2022
8 min read • ––– views
Table of contents 📃
- Intro
- Setup
- Next and Prisma
- Deploying
- Wrap Up
Intro
When exploring serverless database solutions, there's only a few out there right now that pair nicely Prisma.
You can use a traditional DBaaS platform like Amazon RDS or Heroku, but without employing some sort of connection pooling using a tool like PgBouncer you will find that your database will quickly exhaust it's connection limit and take down your entire app due to serverless limitations.
If only there was a database solution out there that integrated seamlessly with Prisma, and did not have to worry at all about managing concurrent connections! Enter Planetscale.
What is PlanetScale?
Based on Vitess, PlanetScale is a new DBaaS platform that allows you to spin up a database in seconds, without having to worry at all about connection management. Vitess is the same technology that powers many hyperscale websites that require critical uptime, performance and scalability. PlanetScale have also introduced some really cool concepts like database branches (similar to Git branching logic) so your database migrations are seamless and non-blocking.
In this article, we'll go over how to create a brand new Next.js Prisma application, connect it to PlanetScale using their newly released connection string options, issue a simple deploy request using PlanetScales non-blocking schema change workflow, and then deploy it to production using Vercel.
Setup
Before we begin, go ahead and sign up for an account at PlanetScale. Once you're all signed up, download the PlanetScale CLI which will be important for connecting to our database locally, creating new database branches, and issuing deploy requests when we make changes to our schema using Prisma.
From your dashboard, click on the "Create database" button and enter a database name (I'll name mine tutorial-db), select a region, and deselect the launch tutorial database option.
In a serverless application, it's important to select a database region that is as close as possible to where your application is being deployed in order to reduce latency. In my case, both my Vercel application and PlanetScale database will be in the AWS ap-south-1 (Mumbai)
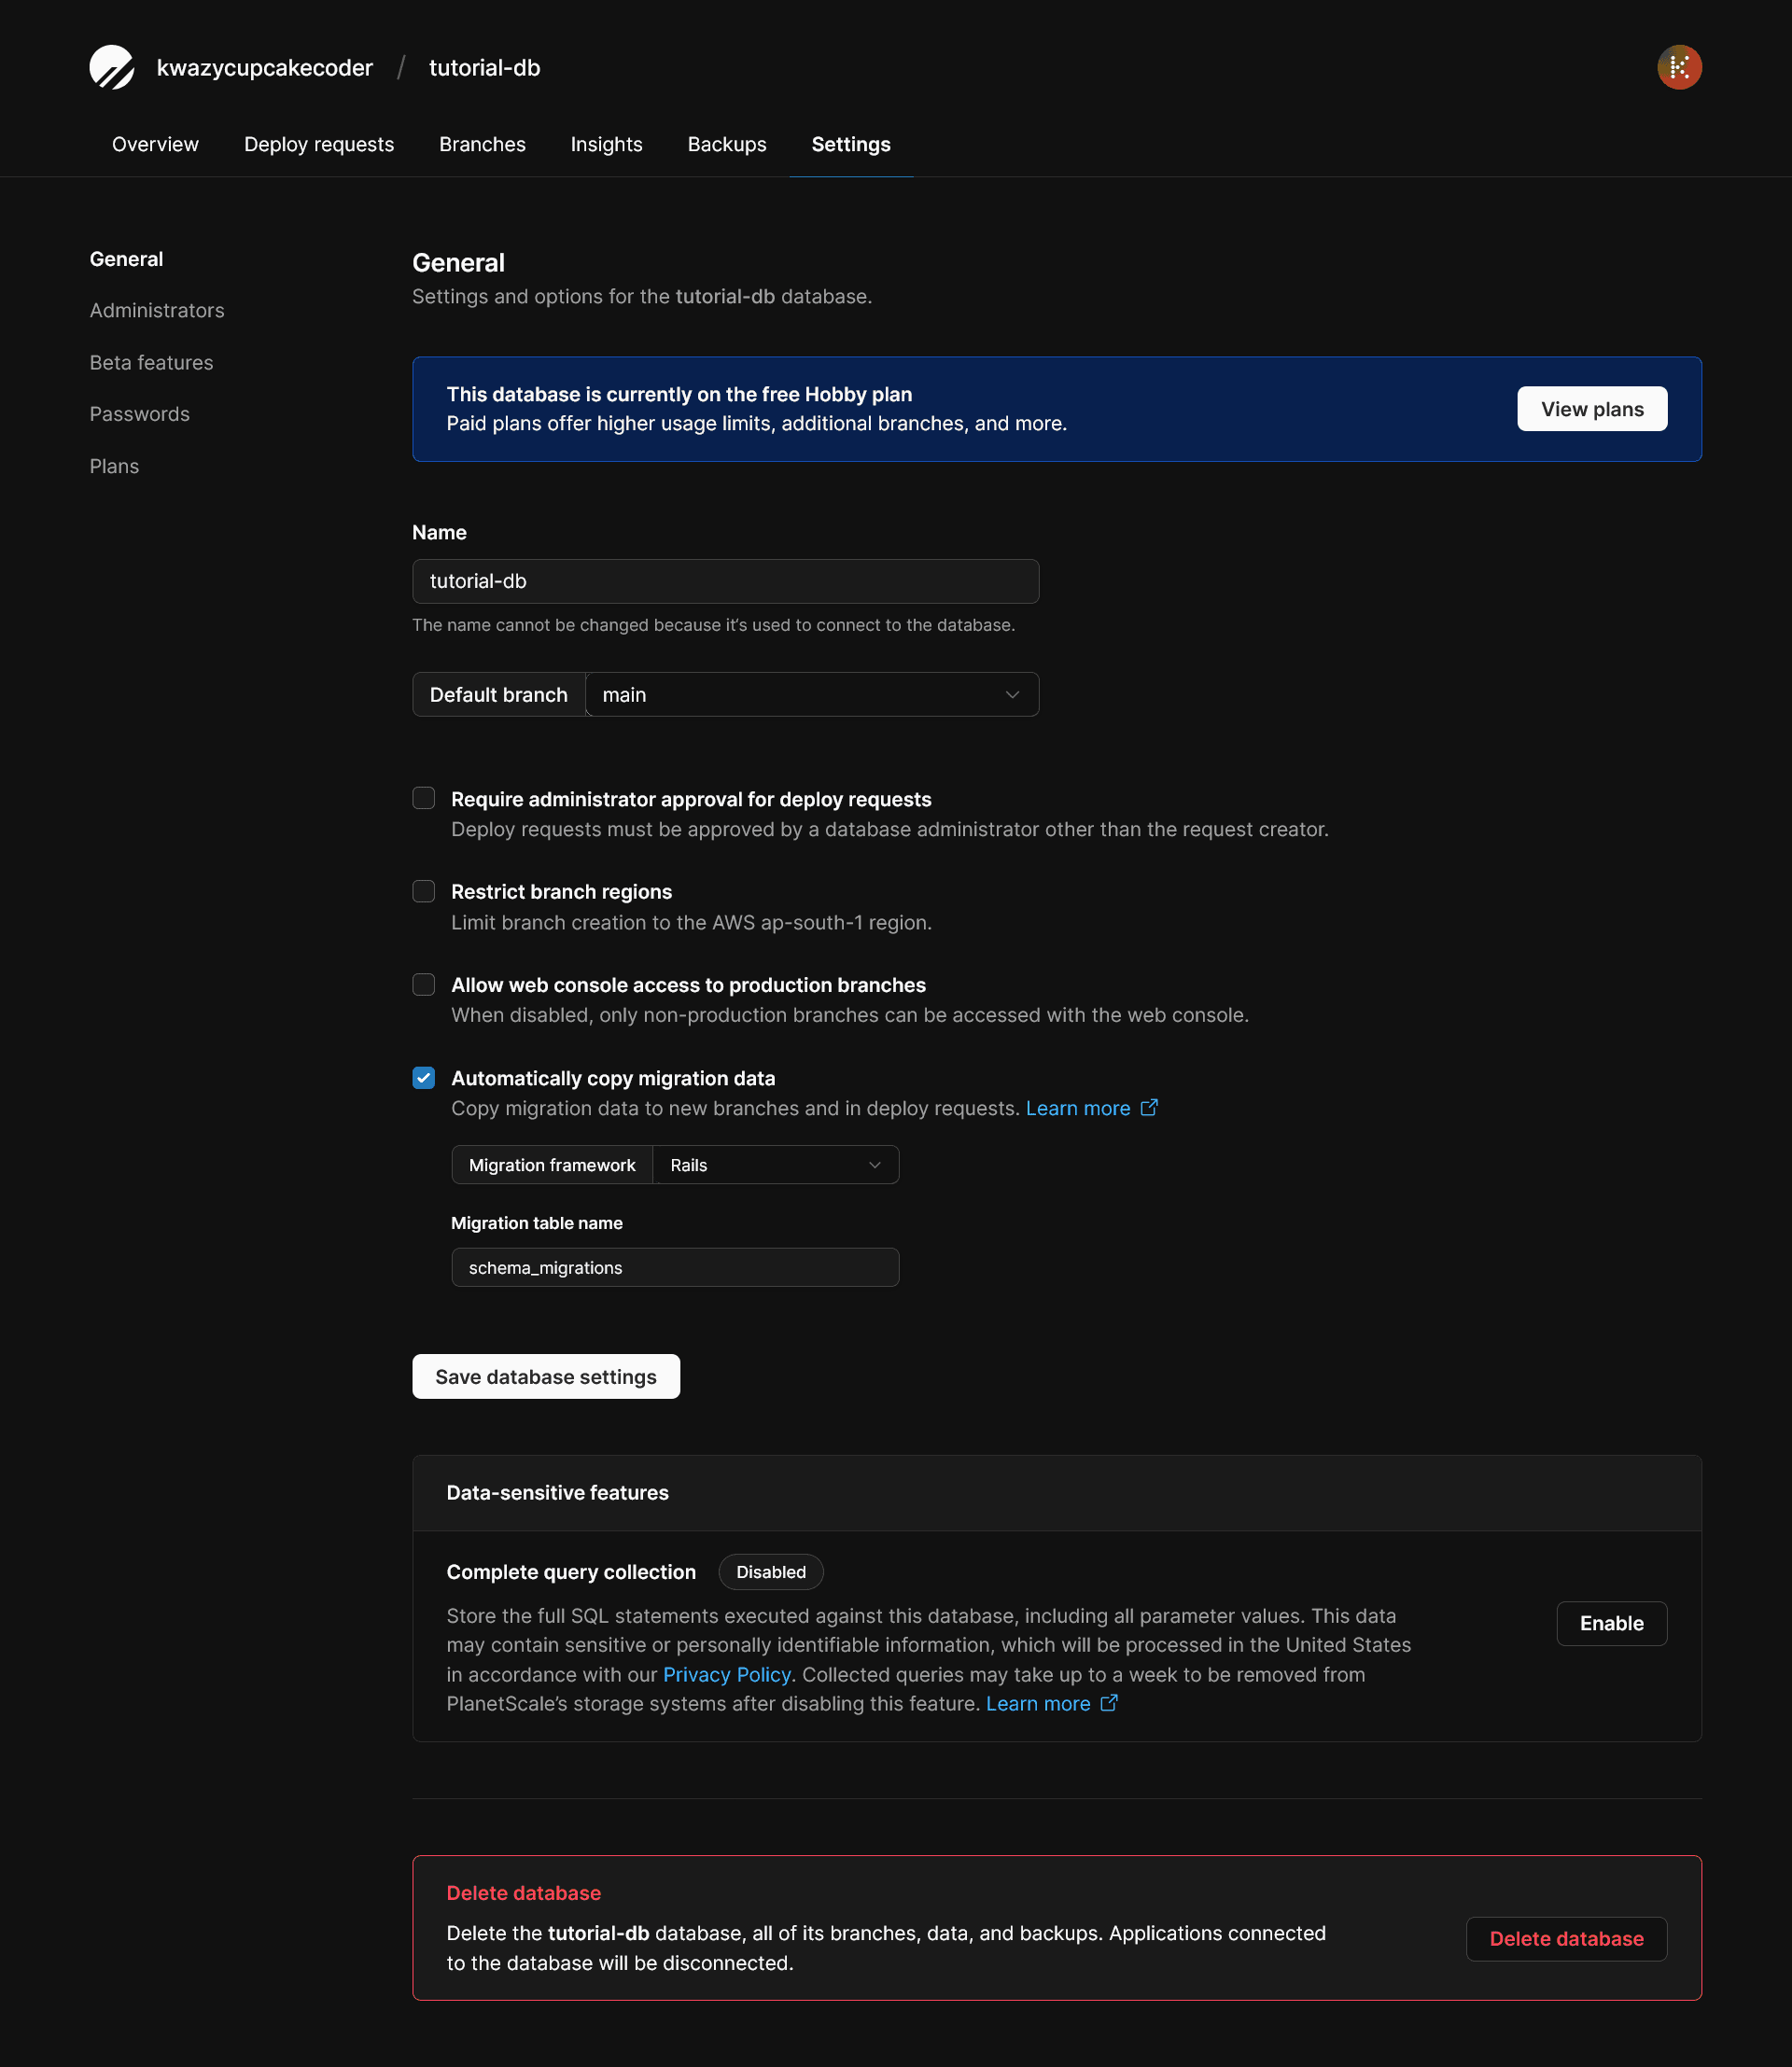
Excellent! Once your database is created, head over to the settings page and enable Automatically copy migration data which will store our Prisma schema migrations in a table called _prisma_migrations any time we merge a deploy request.
Awesome! Head back to your databases dashboard and you should see this view.
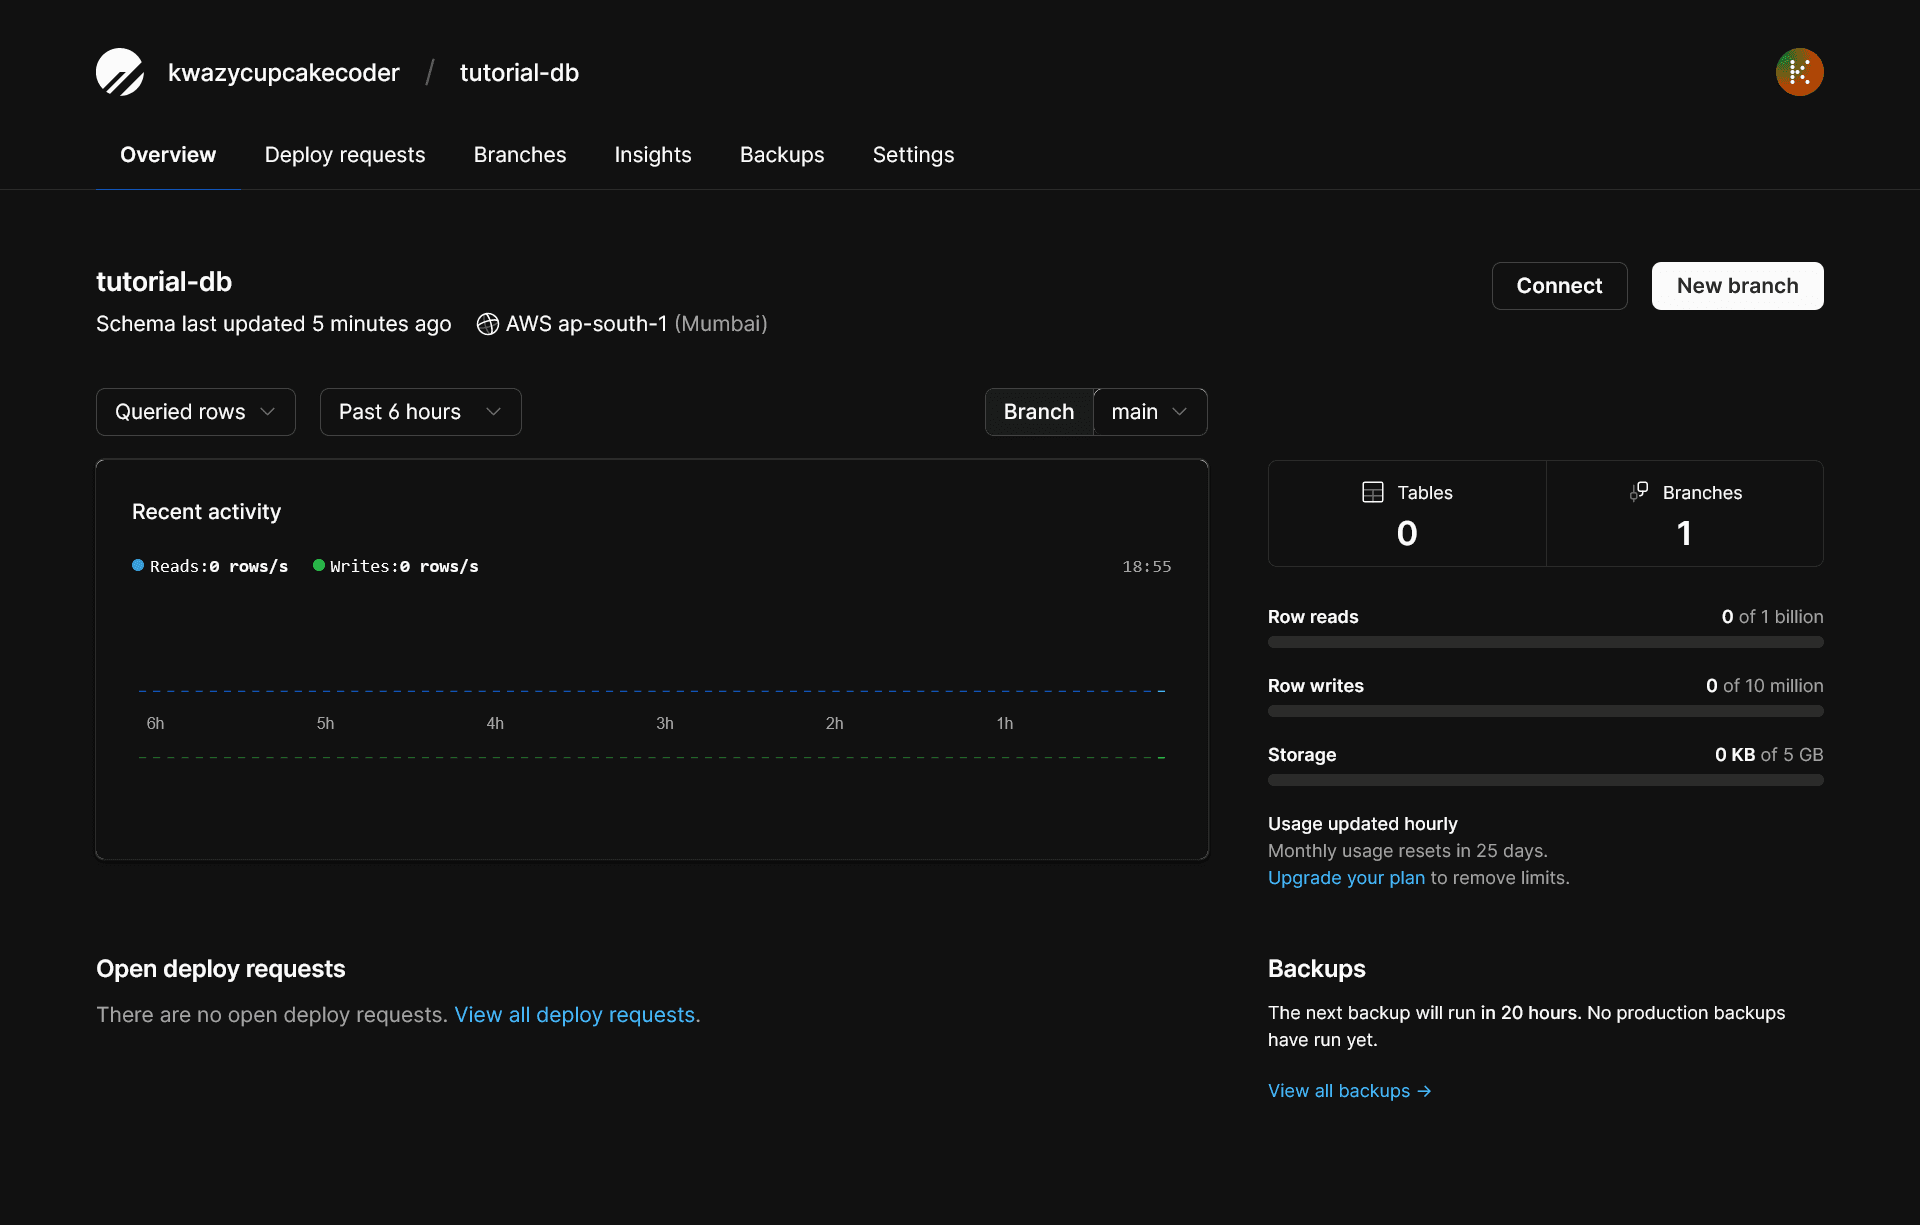
IMP: Before moving forwards you need to push the main branch to production. Otherwise in later steps you will recieve the error Database branch main is not a production branch.
Now that we have our database setup with the copy Prisma migration data option enabled, go ahead and click on the connect button in the top right of your dashboard.
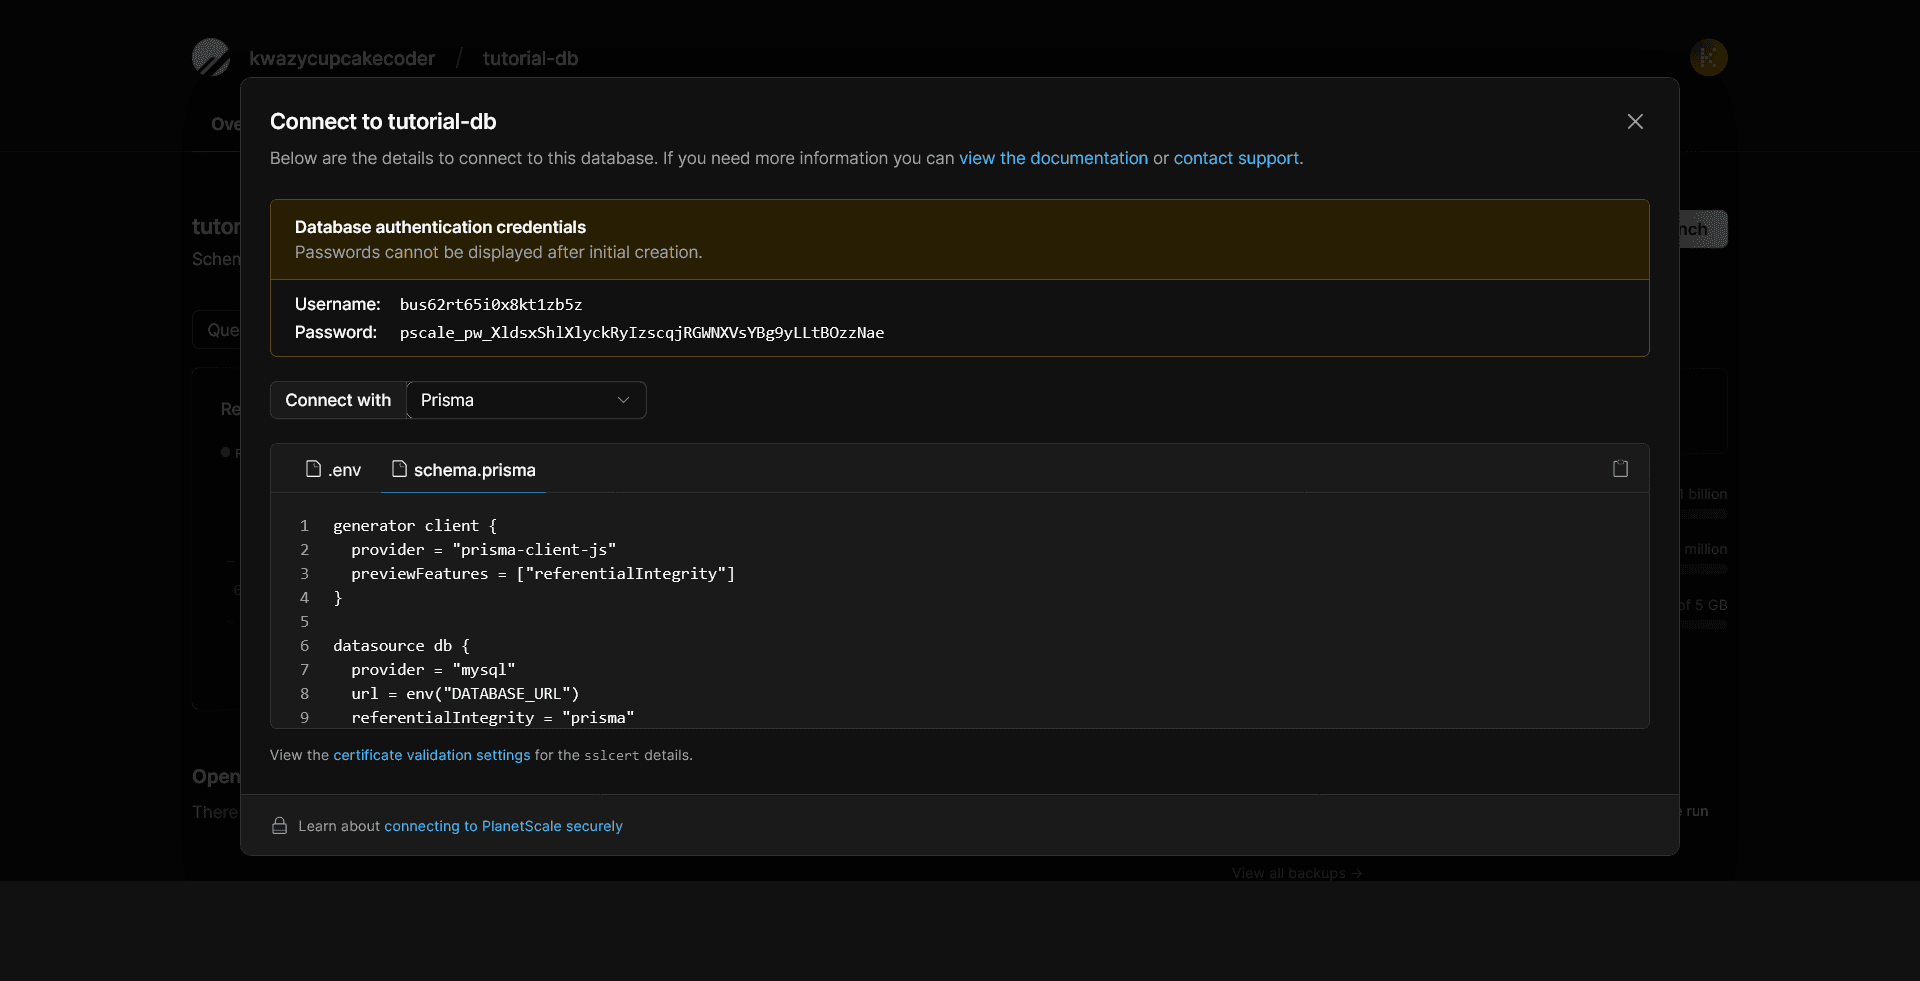
Using the dropdown, select the Prisma format and make sure to save these connection details safely somewhere, as PlanetScale hides your password after the initial generation. (You can always generate a new password if you misplace these credentials, and delete the misplaced one). These are the details we will be using in our Prisma DATABASE_URL environment variable on Vercel during deployment.
Since Prisma migrations follow PlanetScales non-blocking schema migration workflow, we will need to create two additional branches off of our main database branch in order to handle these schema changes. This can be done easily with the PlanetScale CLI.
Go ahead and login to the PlanetScale CLI by issuing the following command in your terminal of choice:
> pscale auth login
Now that we are authenticated, let's create our development branch:
> pscale branch create tutorial-db initial-setup
In two separate terminals, connect to each of these database branches using the following commands:
> pscale connect tutorial-db initial-setup --port 3309
Next.js and Prisma
Now that we have our database and development database branch setup and running, it's time to initialize our Next.js and Prisma application.
Spin up a new Next.js project using the following command:
> npx create-next-app pscale-prisma-tutorial
cd into the new project directory and install the following dependencies:
> npm i @prisma/client
> npm i -D prisma
Initialize Prisma using the following command:
> npx prisma init
Modify the .env file in the root of your project like so:
> DATABASE_URL=mysql://username:password@ap-south.connect.psdb.cloud/dbname?sslaccept=strict
username, password and dbname need to be changes to appropriate values from planetscale dashboard
We will also need to make some PlanetScale-specific adjustments to our schema.prisma file located in our generated prisma folder in order to ensure platform compatibility. Edit our datasource and generate to enable referentialIntegrity equal to prisma, and add referentialIntegrity to our previewFeatures array.
// This is your Prisma schema file,
// learn more about it in the docs: https://pris.ly/d/prisma-schema

generator client {
  provider = "prisma-client-js"
}

datasource db {
  provider = "mysql"
  url      = env("DATABASE_URL")
}

model Post {
  id        Int      @default(autoincrement()) @id
  createdAt DateTime @default(now())
  updatedAt DateTime @updatedAt
  title     String   @db.VarChar(255)
  content   String
}
Now that we have our schema setup, let's push our changes to our development branch!
> npx prisma db push
If all goes well, we should see a success message in our terminal. Now, it's time to open a deploy-request to bring these changes over to our main database branch.
> pscale deploy-request create tutorial-db initial-setup
Woohoo! We've just created our first PlanetScale deploy request. If we head back over to our dashboard and navigate to our deploy requests tab, we should see an open deploy request for our schema changes.
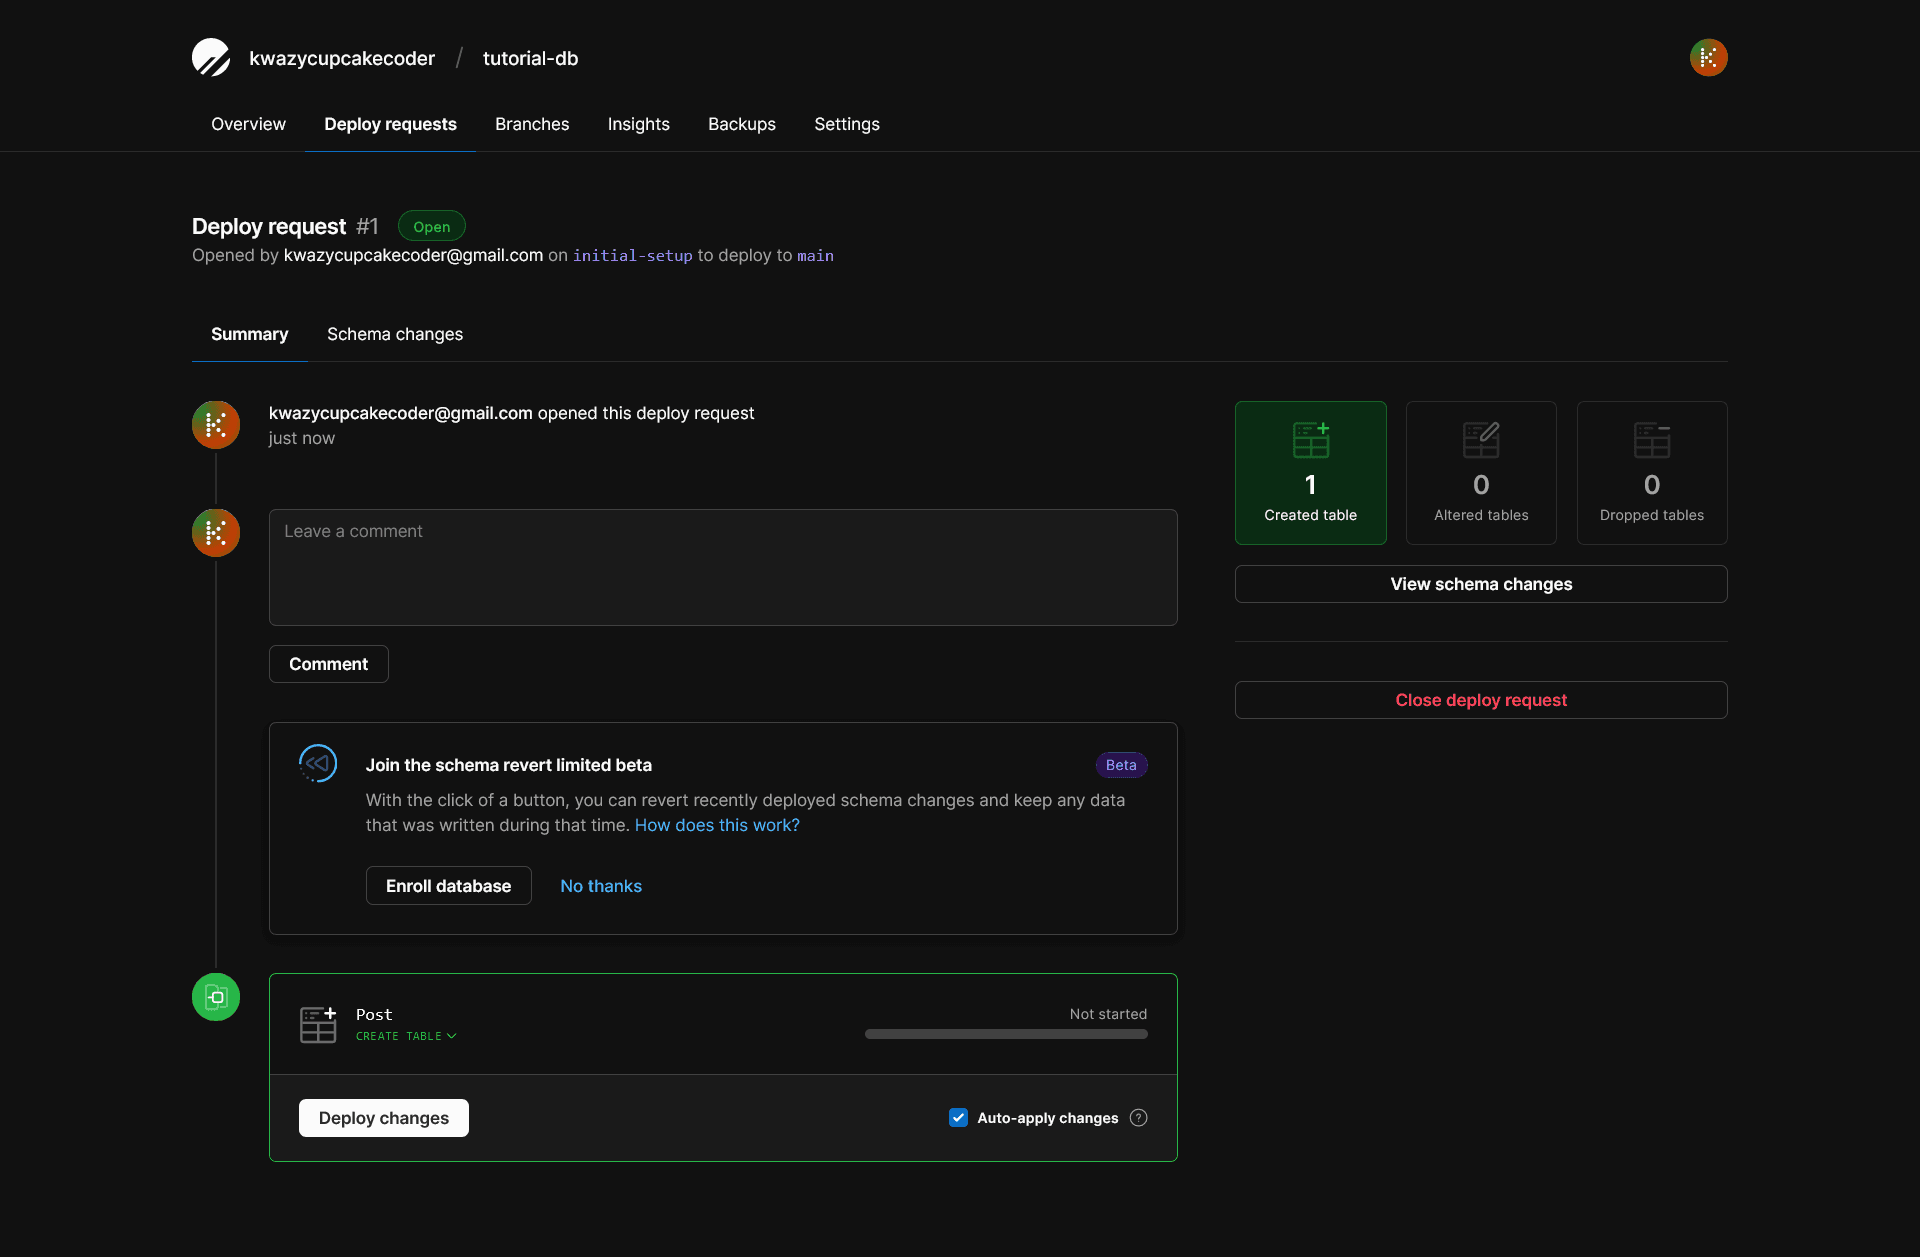
Click on the Deploy changes button and if all goes well, our changes will be deployed to the main database branch!
Now that we have our main branch updated, go ahead and shut down your dev branch connection terminal that have been connected to PlanetScale, and let's rerun a command to open a connection to our main branch on port 3309, so we can add a Post record to our database.
> pscale connect tutorial-db main --port 3309
Let's open a new terminal in our project and run npx prisma studio so we can open Prisma's web GUI
to allow us to add a new Post record to our PlanetScale database. Click Add record from the toolbar
and enter any sample data you'd like.

Now that we have a database setup, our schema deployed to our main branch, and a sample Post added to our database, it's time to setup a serverless function to retrieve all of our posts.
Since we are dealing with a serverless application, we want to avoid instantiating a new Prisma Client on every subsequent request to preserve connections, so let's create a new folder in the root of our project called lib and a file inside called prisma.js so we can export a reusable Prisma Client.
import { PrismaClient } from '@prisma/client'

const prisma = global.prisma || new PrismaClient();

if (process.env.NODE_ENV === "development") global.prisma = prisma;

export default prisma
Next, let's create a new file inside of our api folder in pages/api called posts.js and include the following:
import prisma from "../../lib/prisma";

export default async function assetHandler(req, res) {
  const { method } = req;

  switch (method) {
    case "GET":
      try {
        const posts = await prisma.post.findMany();
        res.status(200).json(posts);
      } catch (e) {
        console.error("Request error", e);
        res.status(500).json({ error: "Error fetching posts" });
      }
      break;
    default:
      res.setHeader("Allow", ["GET"]);
      res.status(405).end(`Method ${method} Not Allowed`);
      break;
  }
}
Now, if we visit http://localhost:3000/api/posts we should see our Post record fetched from our PlanetScale database!
Deploying
Since we are deploying to Vercel, make sure that you are signed up and have your Github account connected to it. Once you have committed your files to Github, select the new project option on Vercel, and scroll down to the environment variables section.
Using the connection string details you saved earlier for our main branch, create a new environment variable for our DATABASE_URL with the connection string you saved earlier.
Go ahead and click deploy!
Once your application is deployed, if you navigate to the same /api/posts endpoint, you should see the data returned.
Congratulations, you have successfully deployed a Next.js Prisma application using PlanetScale as the database to Vercel!
Wrap up 🔚
I hope this article was helpful to any developers out there looking to integrate PlanetScale into their technology stack, and deploy it to production using Vercel. The developer experience PlanetScale provides is fantastic and their support is unparalleled.
If you want to look at the code used for this demo, check out the repository here.
Thanks for reading!
Comments